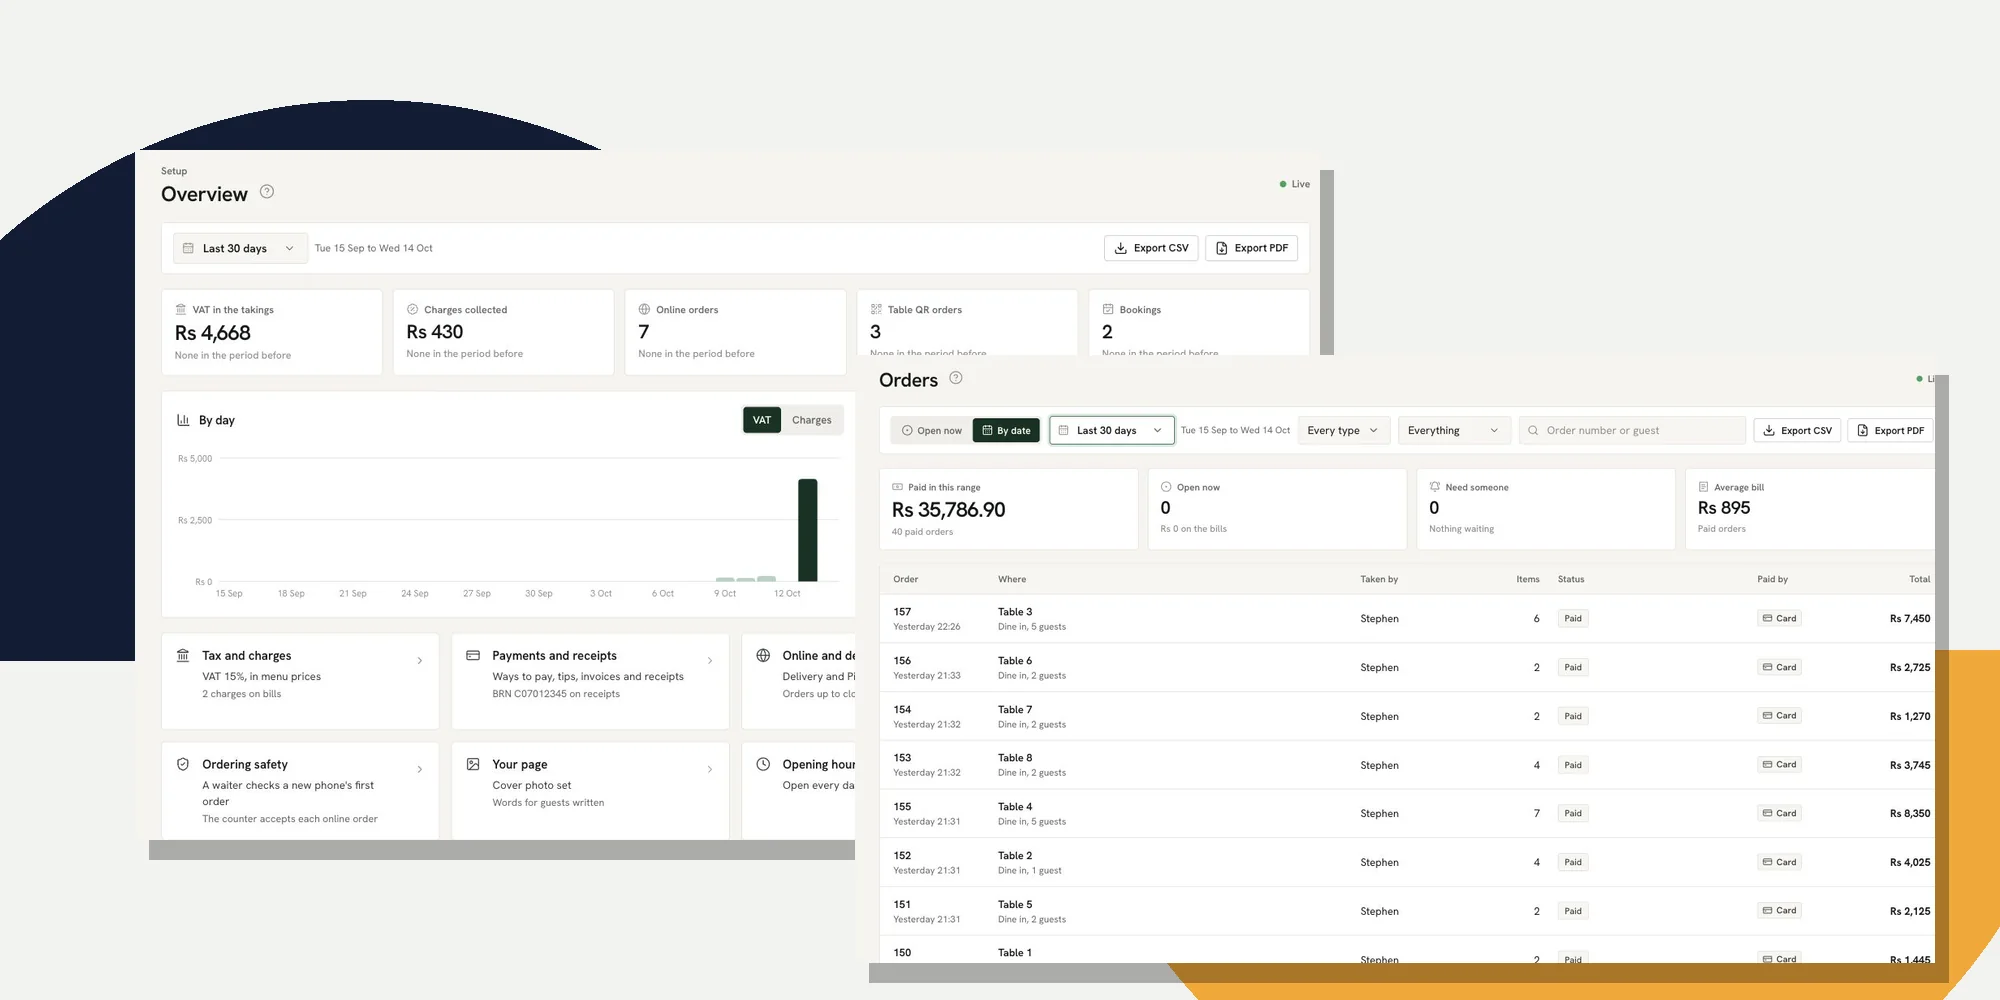
To learn how to set up a restaurant POS system, put the room, menu, payment rules and staff access in place before taking a live order. Then send a test order through the kitchen, close its bill and find it again in the back office. This guide follows that sequence in Ferculon’s back office so a restaurant owner in Mauritius can see what each screen is for.
The screenshots are from Ferculon’s Aegis Grill & Bar demo restaurant. Its dishes, orders and amounts illustrate the controls; they are not a customer result or a forecast for your restaurant. Use your own menu, room and rules when you run the same checks.
| Stage | Where to go | What to check before service |
|---|---|---|
| Restaurant rules | Setup and Opening hours | Opening windows, tax and charges, ways to pay, online and table ordering rules |
| What guests can buy | Menu | Sections, dishes, options, kitchen course, channel visibility and sold-out status |
| Where orders go | Tables and QR codes, Team, Printers and stations | Areas, table names, staff access and the kitchen destination |
| A complete test | Waiter app, kitchen and Orders | Dish sent, ready signal, bill paid and order found again |
| The daily view | Today and finance reports | Paid orders, room status, payment mix and the day report |
Prepare before you set up a restaurant POS system
Write down the areas and tables you actually use, the current menu with options and allergens, the hours for each day, which dishes go to which kitchen station, the payment methods you accept and who may change a bill. Bring the counter lead and a waiter into the setup. The owner can make a tidy back office alone, but the people taking orders will find the gaps first.
Decide which order channels you will turn on first. A dine-in order, a guest’s table QR order, a takeaway and an order from your own page may all reach the kitchen, but each starts in a different place. Set up only the channels your team can serve now. The restaurant management system guide explains the wider set of jobs; this tutorial keeps the first service test narrow.
If you are searching for the best restaurant POS in Mauritius, ask each supplier to demonstrate this same sequence with your room and one of your dishes. A feature list cannot show whether the order survives every hand-off. The POS selection guide gives the broader comparison checks.
Set opening hours, payments and ordering rules
From the office, open Setup, then Overview. It groups Tax and charges, Payments and receipts, Online and delivery, Table QR and bookings, Ordering safety, Your page and Opening hours. Check the hours before enabling a public ordering channel. A wrong closing time can offer a guest an order the kitchen cannot take.
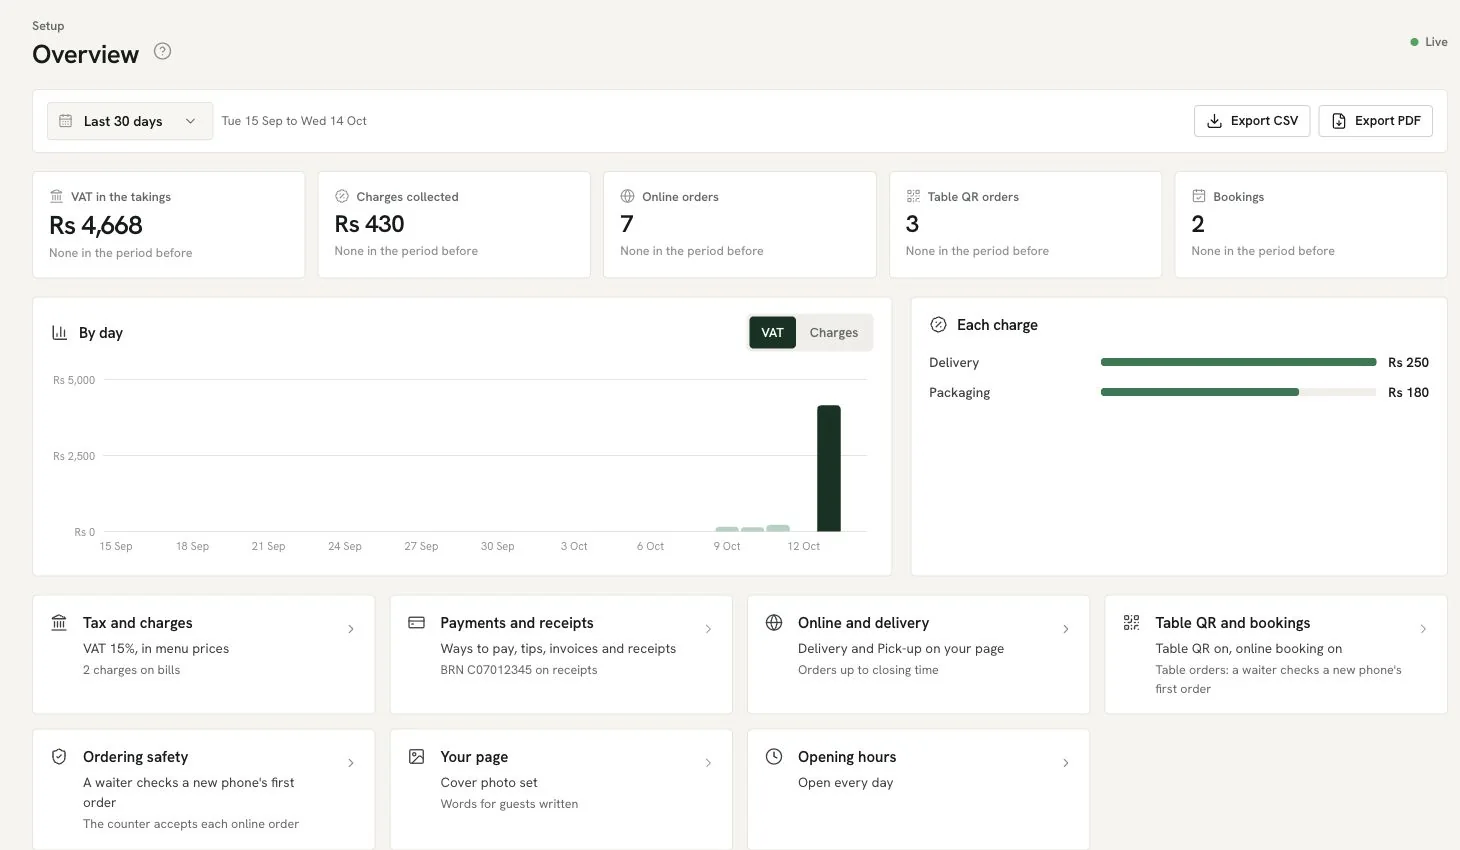
Set the restaurant’s tax and charge rules with your accountant, then check the receipt and each way guests will pay. In Ordering safety, decide whether a waiter must check the first order from a new table QR phone and whether the counter accepts each online order. In Online and delivery, check the pick-up and delivery windows and who takes the order when it arrives. These are choices for the restaurant, not assumptions the software should make for you.
Before moving on, open Printers and stations and check where a test dish will appear. A menu item that looks right at the counter is not ready if its ticket reaches the wrong station. Confirm the kitchen screen and any printer with the person working that station. This operational walkthrough is not tax or legal advice.
Build the menu guests and staff will see
Open Menu. Create sections, then add dishes with their descriptions, prices, options, allergens and the kitchen course or station they need. The screen has Import a menu for an existing document and Add a dish for manual entry. Review imported text and every price before putting a dish on sale; a menu scan is a starting point, not an approval of what a guest may order.
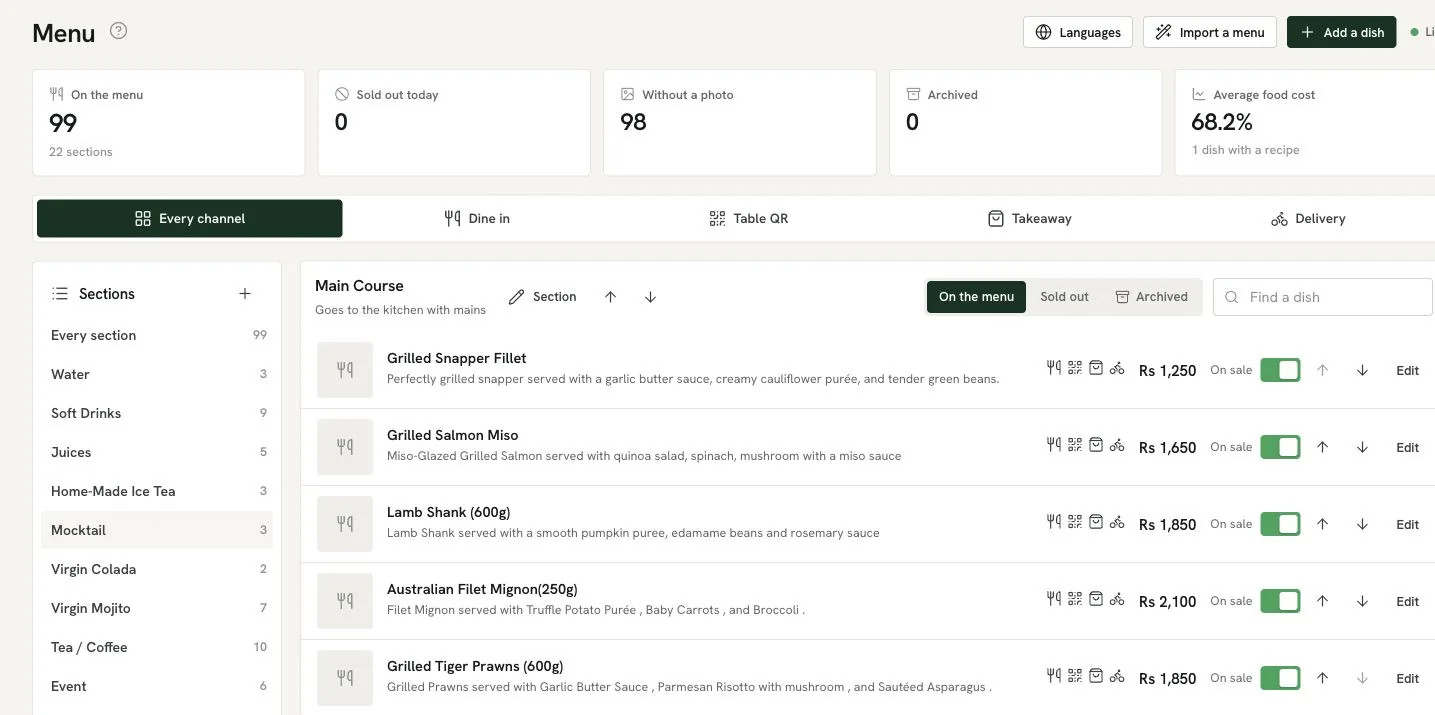
Use the channel tabs to inspect Dine in, Table QR, Takeaway and Delivery. Look at one dish with a choice, one dish with an allergen and one dish you may need to sell out. Switch a demo dish off only in a controlled test, then confirm the guest menu reflects the change. Restore it before service. The guest ordering page and the waiter view should show the same dish name and permitted options.
Keep your menu as specific as the kitchen’s work. If a dish belongs to mains, check that it goes with mains. If a modifier affects preparation, write it as a real option rather than asking staff to remember a note. A good setup makes the order clear at the pass before the rush starts.
Set the floor and give the team the right access
Open Tables and QR codes. Use Floor plan to place the dining room and terrace tables that exist, give each table a recognisable name and check its seats. The room view then shows the status of every table, including seated, in the kitchen, food ready, eating and bill asked. The demo room below is quiet; during service the same plan shows which table needs a person.
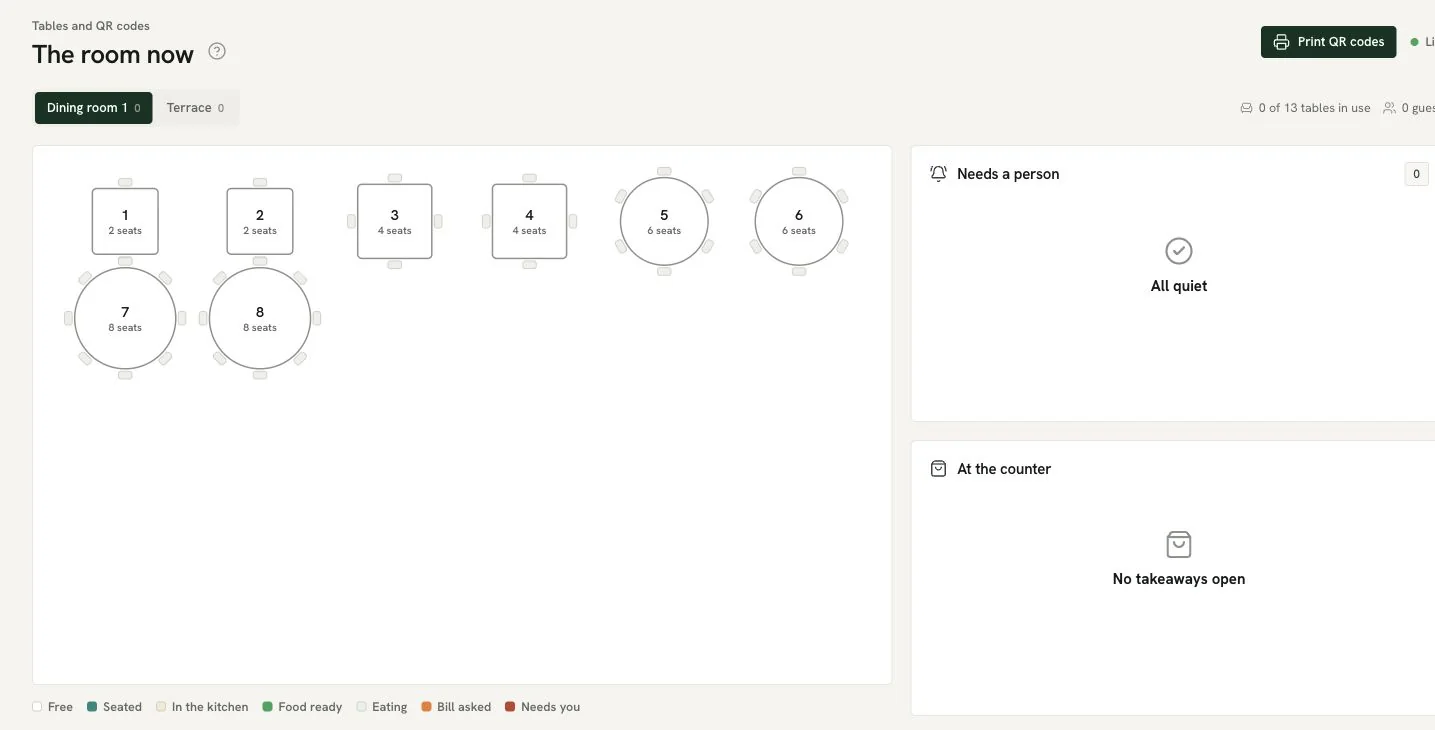
Use Team to give each person the access their shift needs. Give a waiter the tables they will cover, and check that the counter can see guest calls and bill requests. Print a table’s QR code only after the table name and public menu are correct. The floor and waiter guide shows table assignments and the live service states in more detail.
Run one test order through the kitchen
With the team present, open a demo table in the waiter app, add a dish and its option, and send it. Ask the kitchen to find the ticket in the right course and station, then mark it ready. Ask the assigned waiter to find the ready signal and check that it belongs to the correct table. Use a controlled test order before real service and deal with the test bill according to your restaurant’s record-keeping procedure.
Repeat the route that matters most to your business: a guest ordering at the table by QR code, a takeaway at the counter, or an order from your own page. Online orders can wait for the counter to accept them when that rule is enabled; table QR can require a waiter to check a new phone’s first order. Do not assume those settings are the same in every restaurant. The kitchen display guide explains the ticket and ready-message hand-off.
Track open and paid orders in the back office
Open Orders. Open now shows the bills still open. By date shows order history for the chosen range. Filter by Dine in, Table QR, Takeaway, Pick-up or Delivery, or show orders with voids or discounts. Search by order number or guest when you have a reference from the counter. The top figures separate paid takings from open bills and show whether a table needs someone.
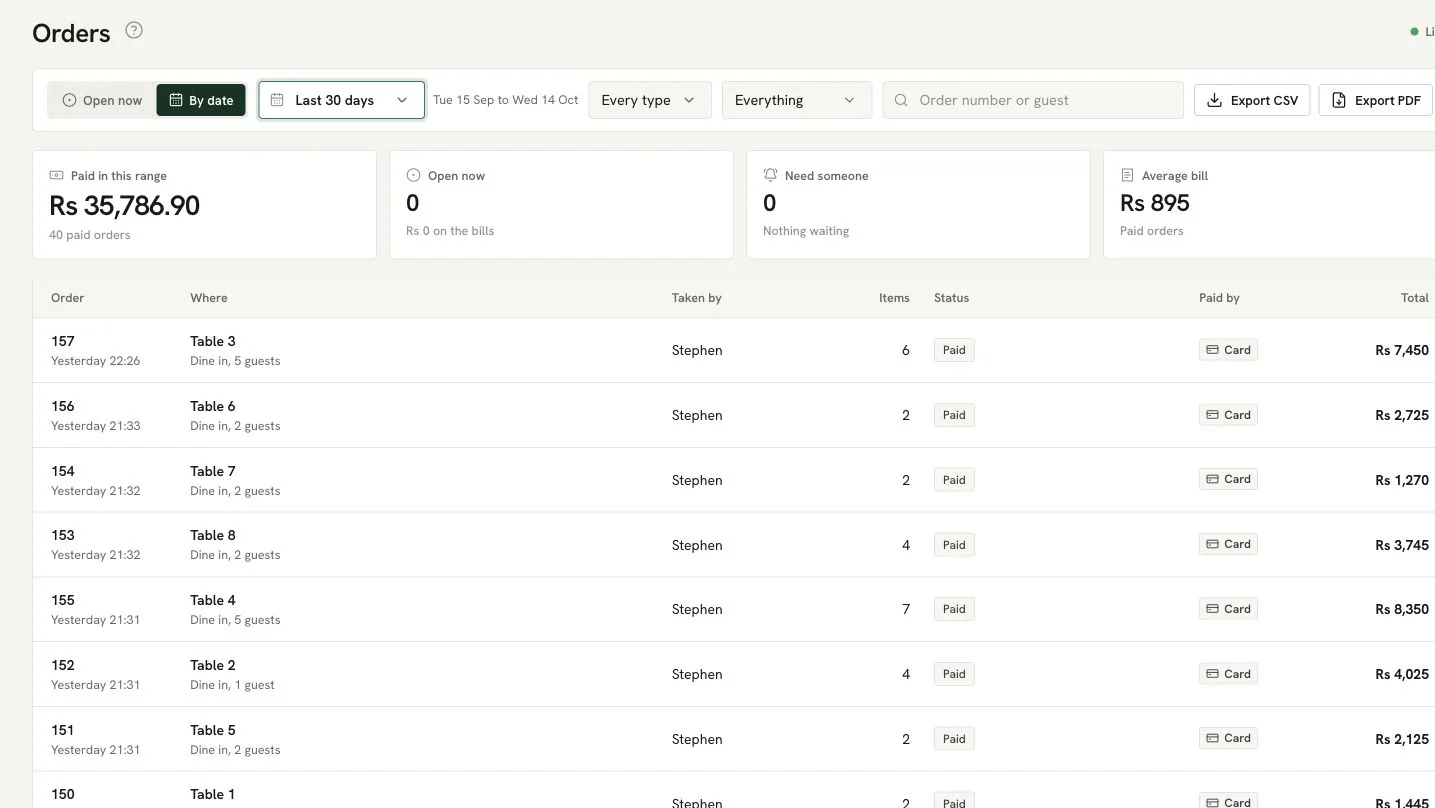
Open an order row to inspect its dishes, bill, payment method, receipt and changes. A row’s status tells you whether it is paid or void; the details show what happened to that particular order. If a bill was split or a dish was voided, check the record rather than trying to infer it from the total alone. Export the chosen range when a manager or accountant needs a copy, subject to the access held by the person signed in.
This is where a restaurant order management system earns its place. The counter can answer what happened to an order without relying on a separate notebook. The order history is evidence of what was recorded, but it cannot tell you whether a guest was happy or whether a plate was carried to the correct table unless staff keep the service states accurate.
Read the day and decide what to fix
Return to Today. It shows sales so far, order count, average bill, guests, open bills, sales by hour, the room, payment methods and the week ahead. The Day report gives a PDF of that day for an authorised person. Use the screen during service to spot a table waiting for help, then use Orders to inspect a specific bill. At closing, reconcile the payment and till figures with the restaurant’s own procedure.
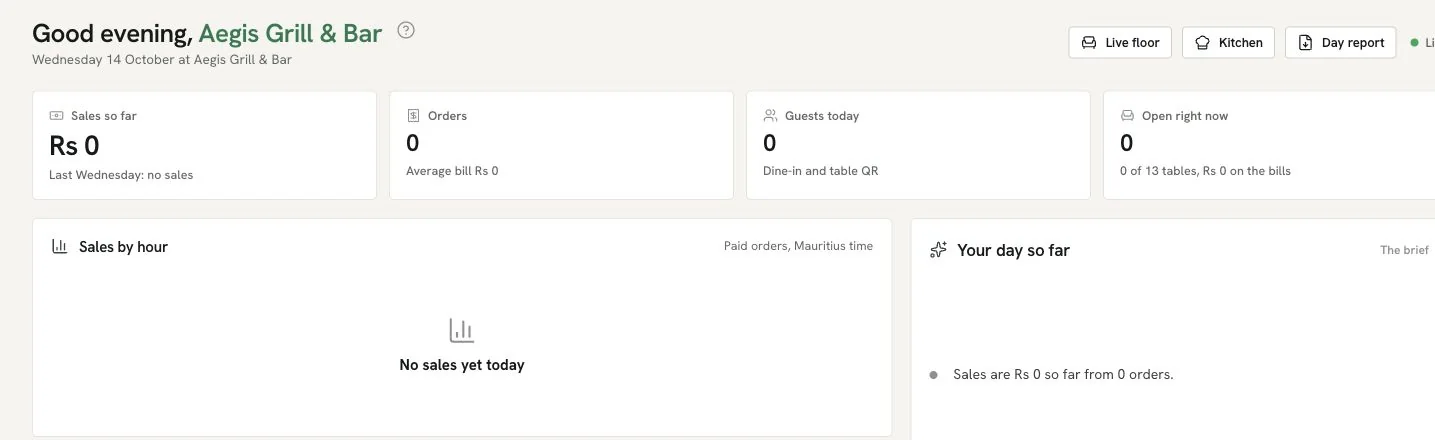
For a fuller review, the back office links orders with finance, stock and reports. The best restaurant management system for your restaurant should let your team trace a figure back to the orders behind it. Ask a supplier to show that trace during a demonstration, using your own service pattern.
Know what the setup does not decide for you
Software can record the rules you choose, show an order’s route and keep a history of changes. It cannot decide whether your floor plan is truthful, whether a menu description is safe, whether a tax setting is right for your business or when a late guest should lose a table. Keep a named owner for those decisions and test an internet or power outage before service. Ferculon does not transmit fiscal invoices to the Mauritius Revenue Authority Electronic Billing System.
If you are comparing the best restaurant POS Mauritius results, bring your room plan and a real menu section to a Ferculon demonstration. Ask the team to run the setup and order test above, then review the pricing page for a quote suited to your restaurant.
Questions people ask
What should I set up first in a restaurant POS?
Start with opening hours, payment and ordering rules, then build the menu and floor plan. Give staff the right access and run a controlled order through the kitchen before accepting live orders. Check that the paid order appears in history.
How do I track an order in Ferculon?
Open Orders in the back office. Use Open now for active bills or By date for history, then filter by order type or search by order number or guest. Open a row to inspect its bill, payment, receipt and changes.
Can one menu serve dine-in, QR, takeaway and delivery?
Ferculon’s Menu screen has channel views for Dine in, Table QR, Takeaway and Delivery. Check each dish and option in the channels you enable, and confirm that sold-out changes reach the guest menu. The kitchen course and station also need a test order.
Does the dashboard show what is happening during service?
Today shows paid sales, orders, guests, open bills and room status, with links to the live floor and a day report for authorised staff. Use Orders for the detail behind a particular bill. The figures depend on staff recording the service and payments correctly.
Does Ferculon send fiscal invoices to the MRA Electronic Billing System?
No. Ferculon does not transmit fiscal invoices to the MRA Electronic Billing System. Check your own obligations with a qualified adviser and use this guide only for operational setup; it is not tax or legal advice.